1) Unplug the serial cable from the printer port on the AE400, if a printer port is installed in the AE400.
2) Connect a serial cable from a pc serial port to the printer port of the AE400. A USB to serial adapter may be used.
3) Open up a terminal program (like Hyperterminal) on the pc. (Start/Programs/Accessories/Communications/Hyperterminal).
4) Create a new Hyperterminal connection. Connect using serial port. (9600 baud, 8 data bits, 1 stop bit, no parity, no flow control). File/ SaveAs and save the connection to the pc desktop.
5) File/properties/settings tab/ascii setup/ascii receiving, check "append line feed to incoming line ends". This setting can only be made when Hyperterminal is disconnected from the AE400. Press the 'on-hook' icon in the top menu bar to disconnect Hyperterminal connection. Also click the local character echo check box in Hyperterminal ascii setup.
6) Close out of ascii set up and then save your settings File/Save.
7) Press and hold in the menu button on the AE400 until the menu appears on the pc. The match and no match leds should appear on the AE400.
8) Choose menu option 2. Choose N for new time. Enter the new time. Press ONE character at a time and wait for the AE400 to respond.
9) Choose menu option 3. Choose N for new date. Enter new date and day of the week. Press ONE character at a time and wait for the AE400 to respond.
10) Press E for exit the menu.
11) Reconnect the printer to the AE400, if one is installed.
12) The correct time should be on the AE400 from LCD screen.
13) Power down (pull the power plug) and then power up the AE400 to make sure all settings have reset.
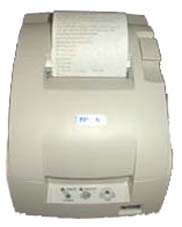
14) Press the + button on the AE400 and make sure the last alert prints (if a printer is installed).
15) Press the last alert button on the AE400 and make sure the alert is received by the FipsSender software.
16)** Note..When using the FipsSender II software, the + button will send the alert to the FipsSender II and the last alert button will send the unit to the printer.
Instructions to reset the time on the LED Signboard using FipsSender II Software
1) Go to the Auto Sign Set / TxWx Clock tab.
2) **Make sure your PC time and date are correct!!
3) Press the Set Sign Clock button.
4) Make sure the time is correct on each sign.